

How To Use Cloudflare Snapshot
Introduction
Snapshot Failover™ is our proprietary loftier availability setup that allows you to clone all of the sites on one server over to another server, and ready a syncing schedule for those paired servers of as little equally one 60 minutes.
Couple this with automatic DNS failover that will switch your DNS records to your backup server if your primary server goes down, and yous can ensure that your websites stay up and running fifty-fifty when your provider has an outage that impacts an entire datacenter.
This characteristic is available on Developer accounts.
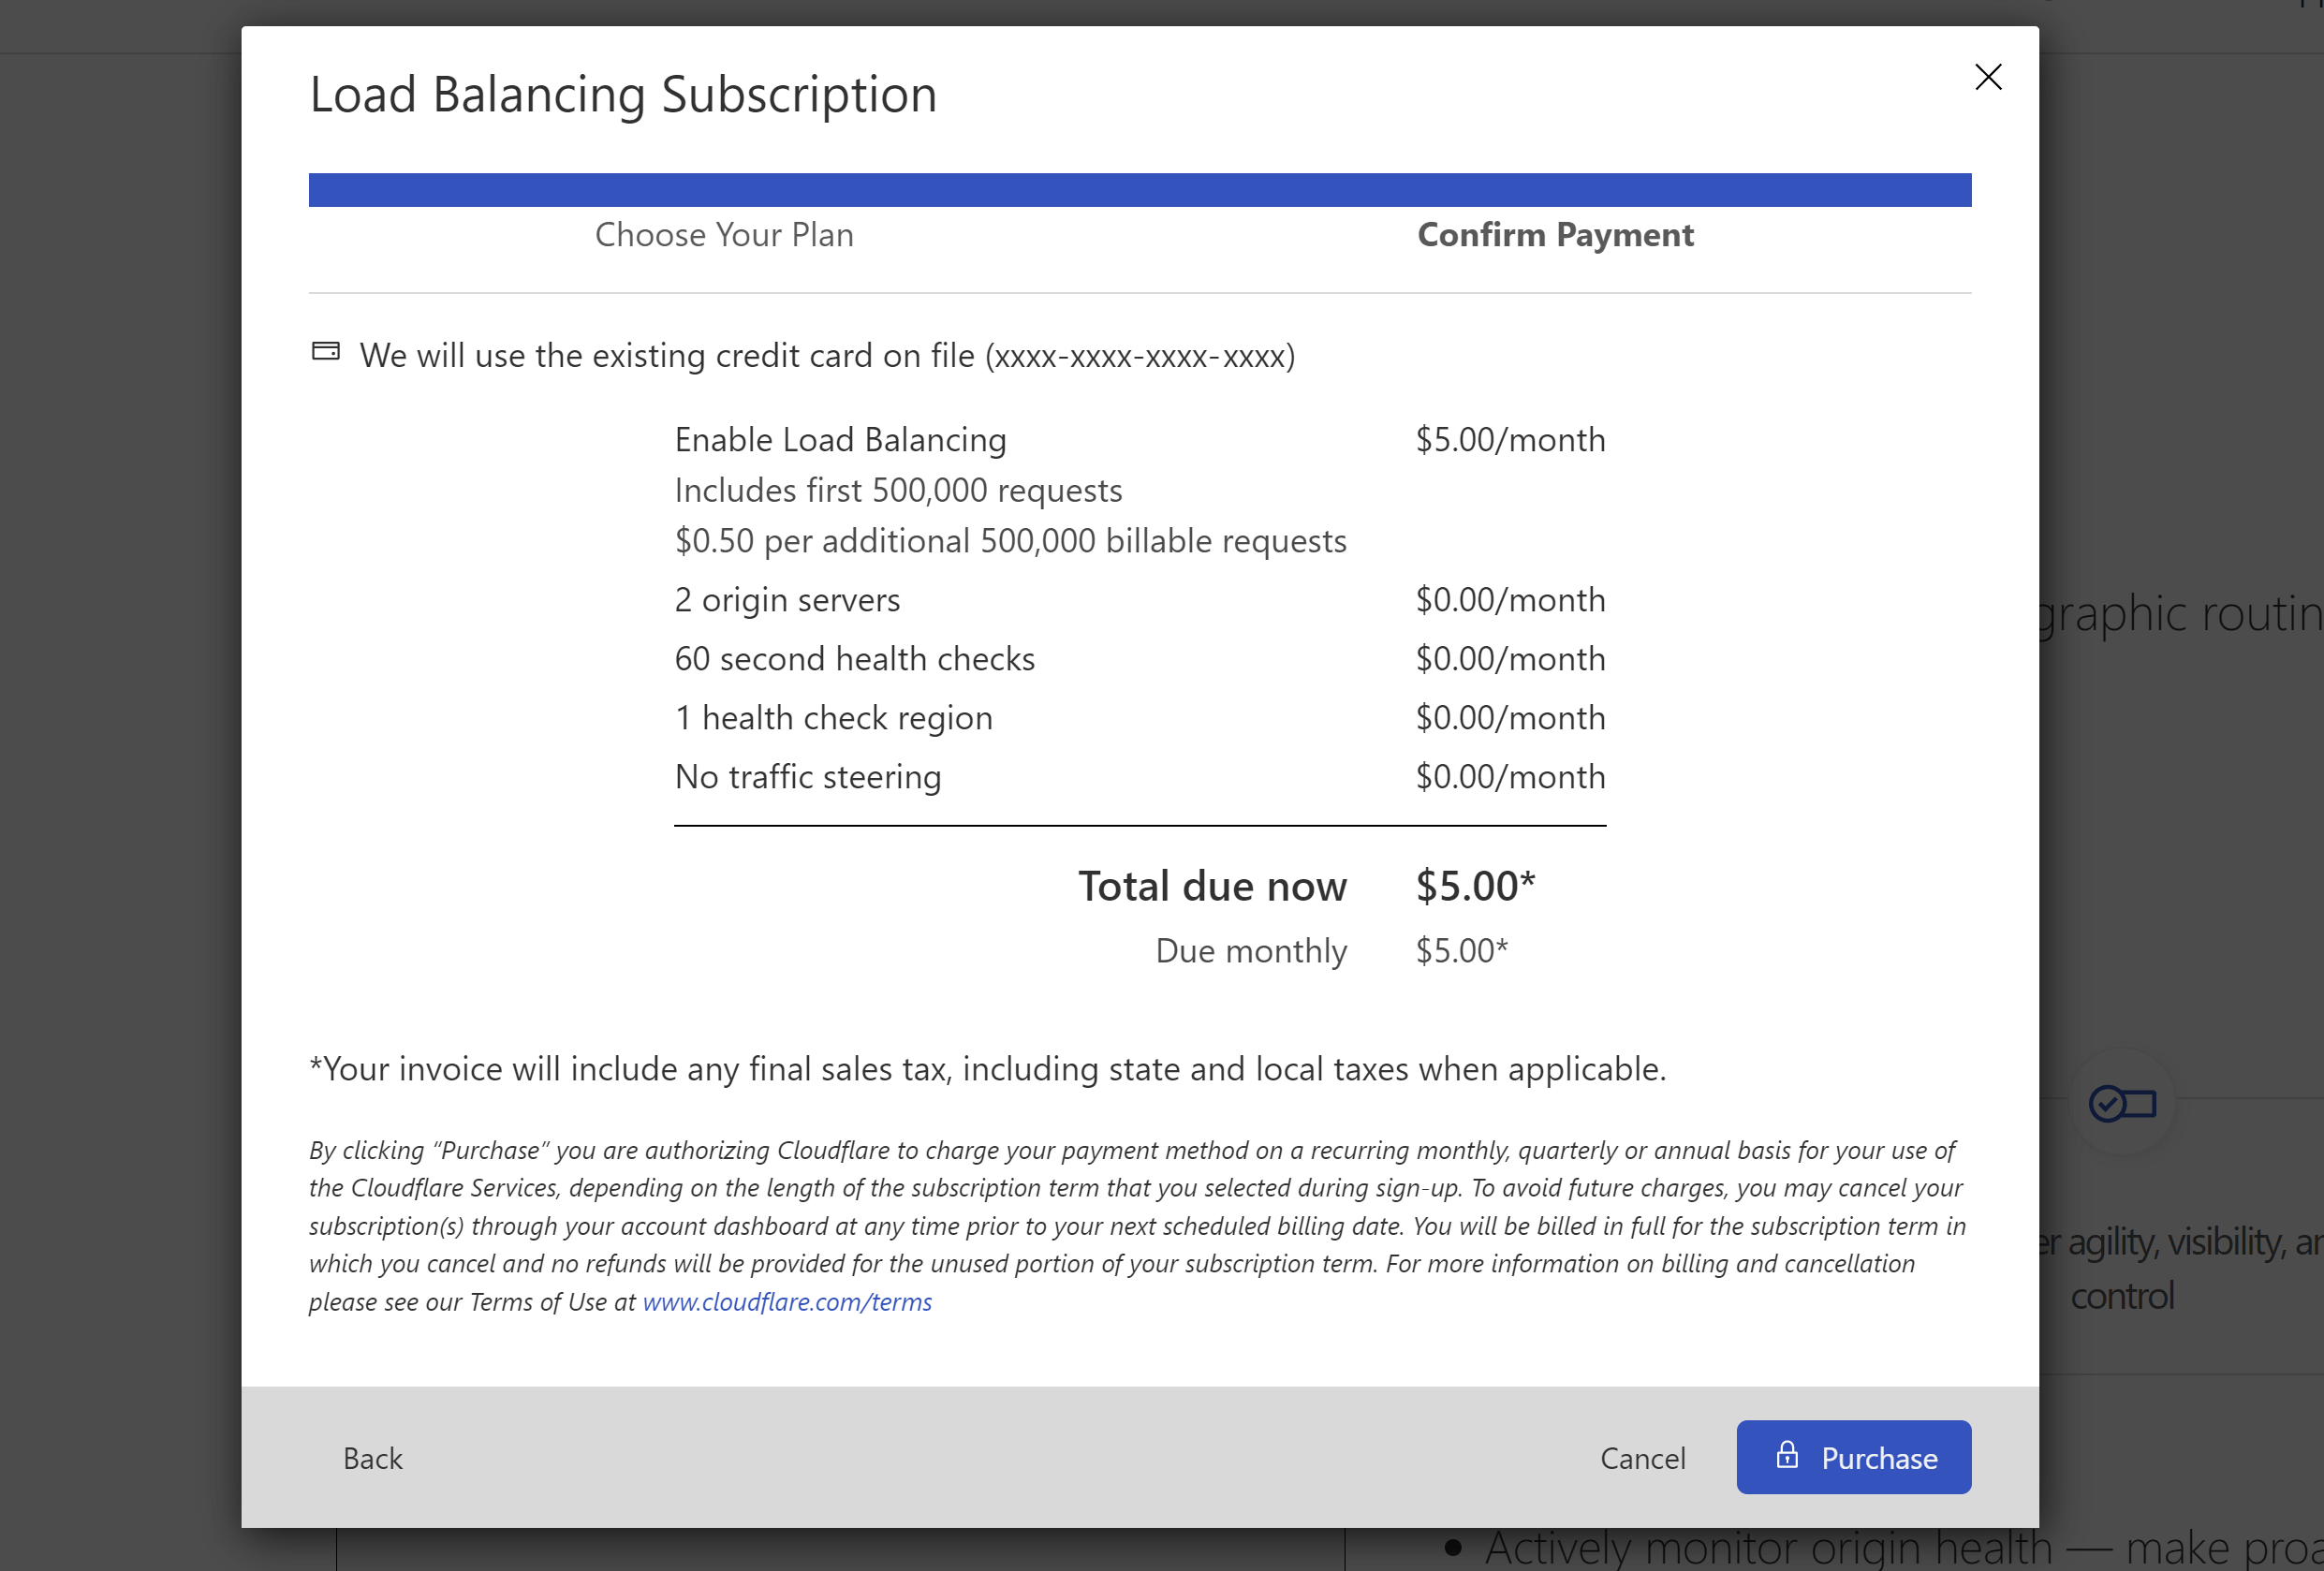
Note:Currently Cloudflare'south gratis program is not supported. The Cloudflare Load Balancing Feature which tin can be used for Automatic Failover starts from $5/month per site.
How does it work?

This article details how to setup Snapshot Failover works in conjunction with Cloudflare.
GridPane's office is to practise the cloning and ensure that the websites on your primary server are cloned over to your fill-in server, on the schedule that you set inside your dashboard.
Cloudflare'due south office is to monitor your primary server and if it sees it down, automatically adjust your DNS records to point to your backup server.
Function 1. Setting upward Snapshot Failover™ Inside GridPane
Offset, navigate to the "Tools" page within your dashboard. Snapshot Failover™ lives direct below the Self Help Tools.
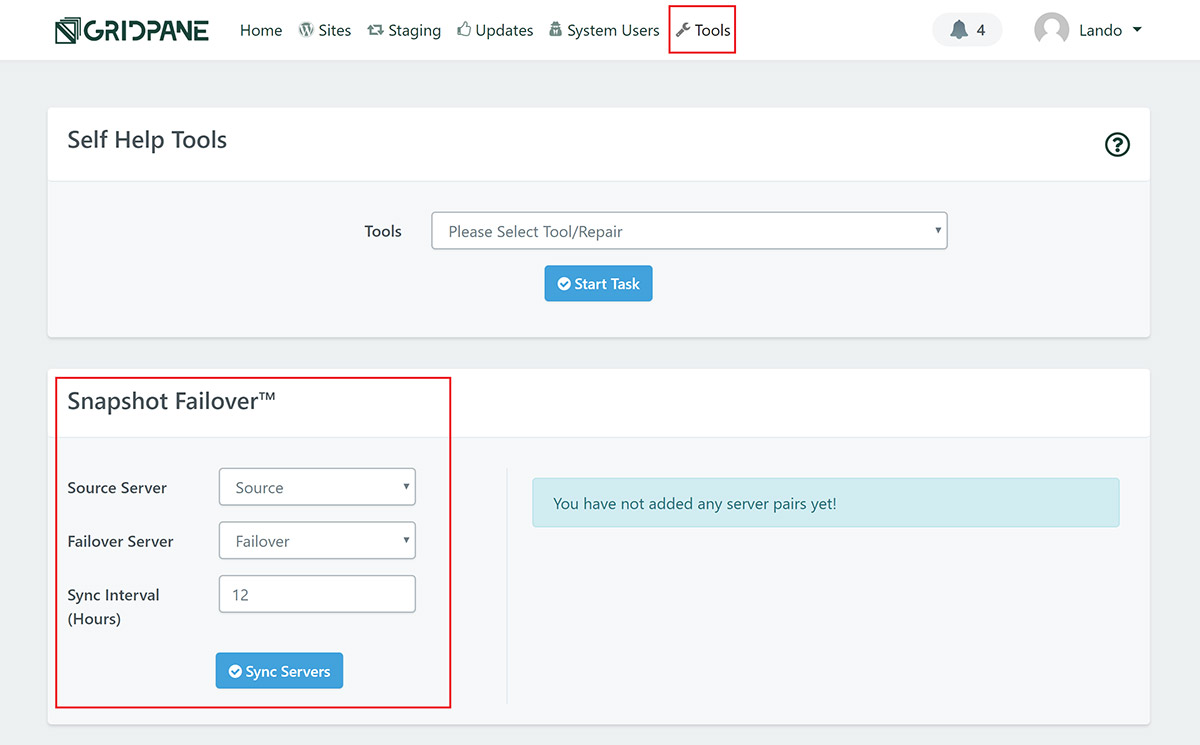
Hither we demand to set the source server, failover server and sync interval.
- Source Server: Select the server you lot wish to fill-in
- Failover Server:Select the server you wish to use as your backup
- Sync Interval (Hours): Select how frequently you want the cloning to have place. E.g. For the servers to sync every four hours, blazon "4". You tin can gear up syncing to have identify anywhere between 1 hour and 72 hours.
Once you've set the details, click the "Sync Servers" button.
Step 1: Setup Load Balancing
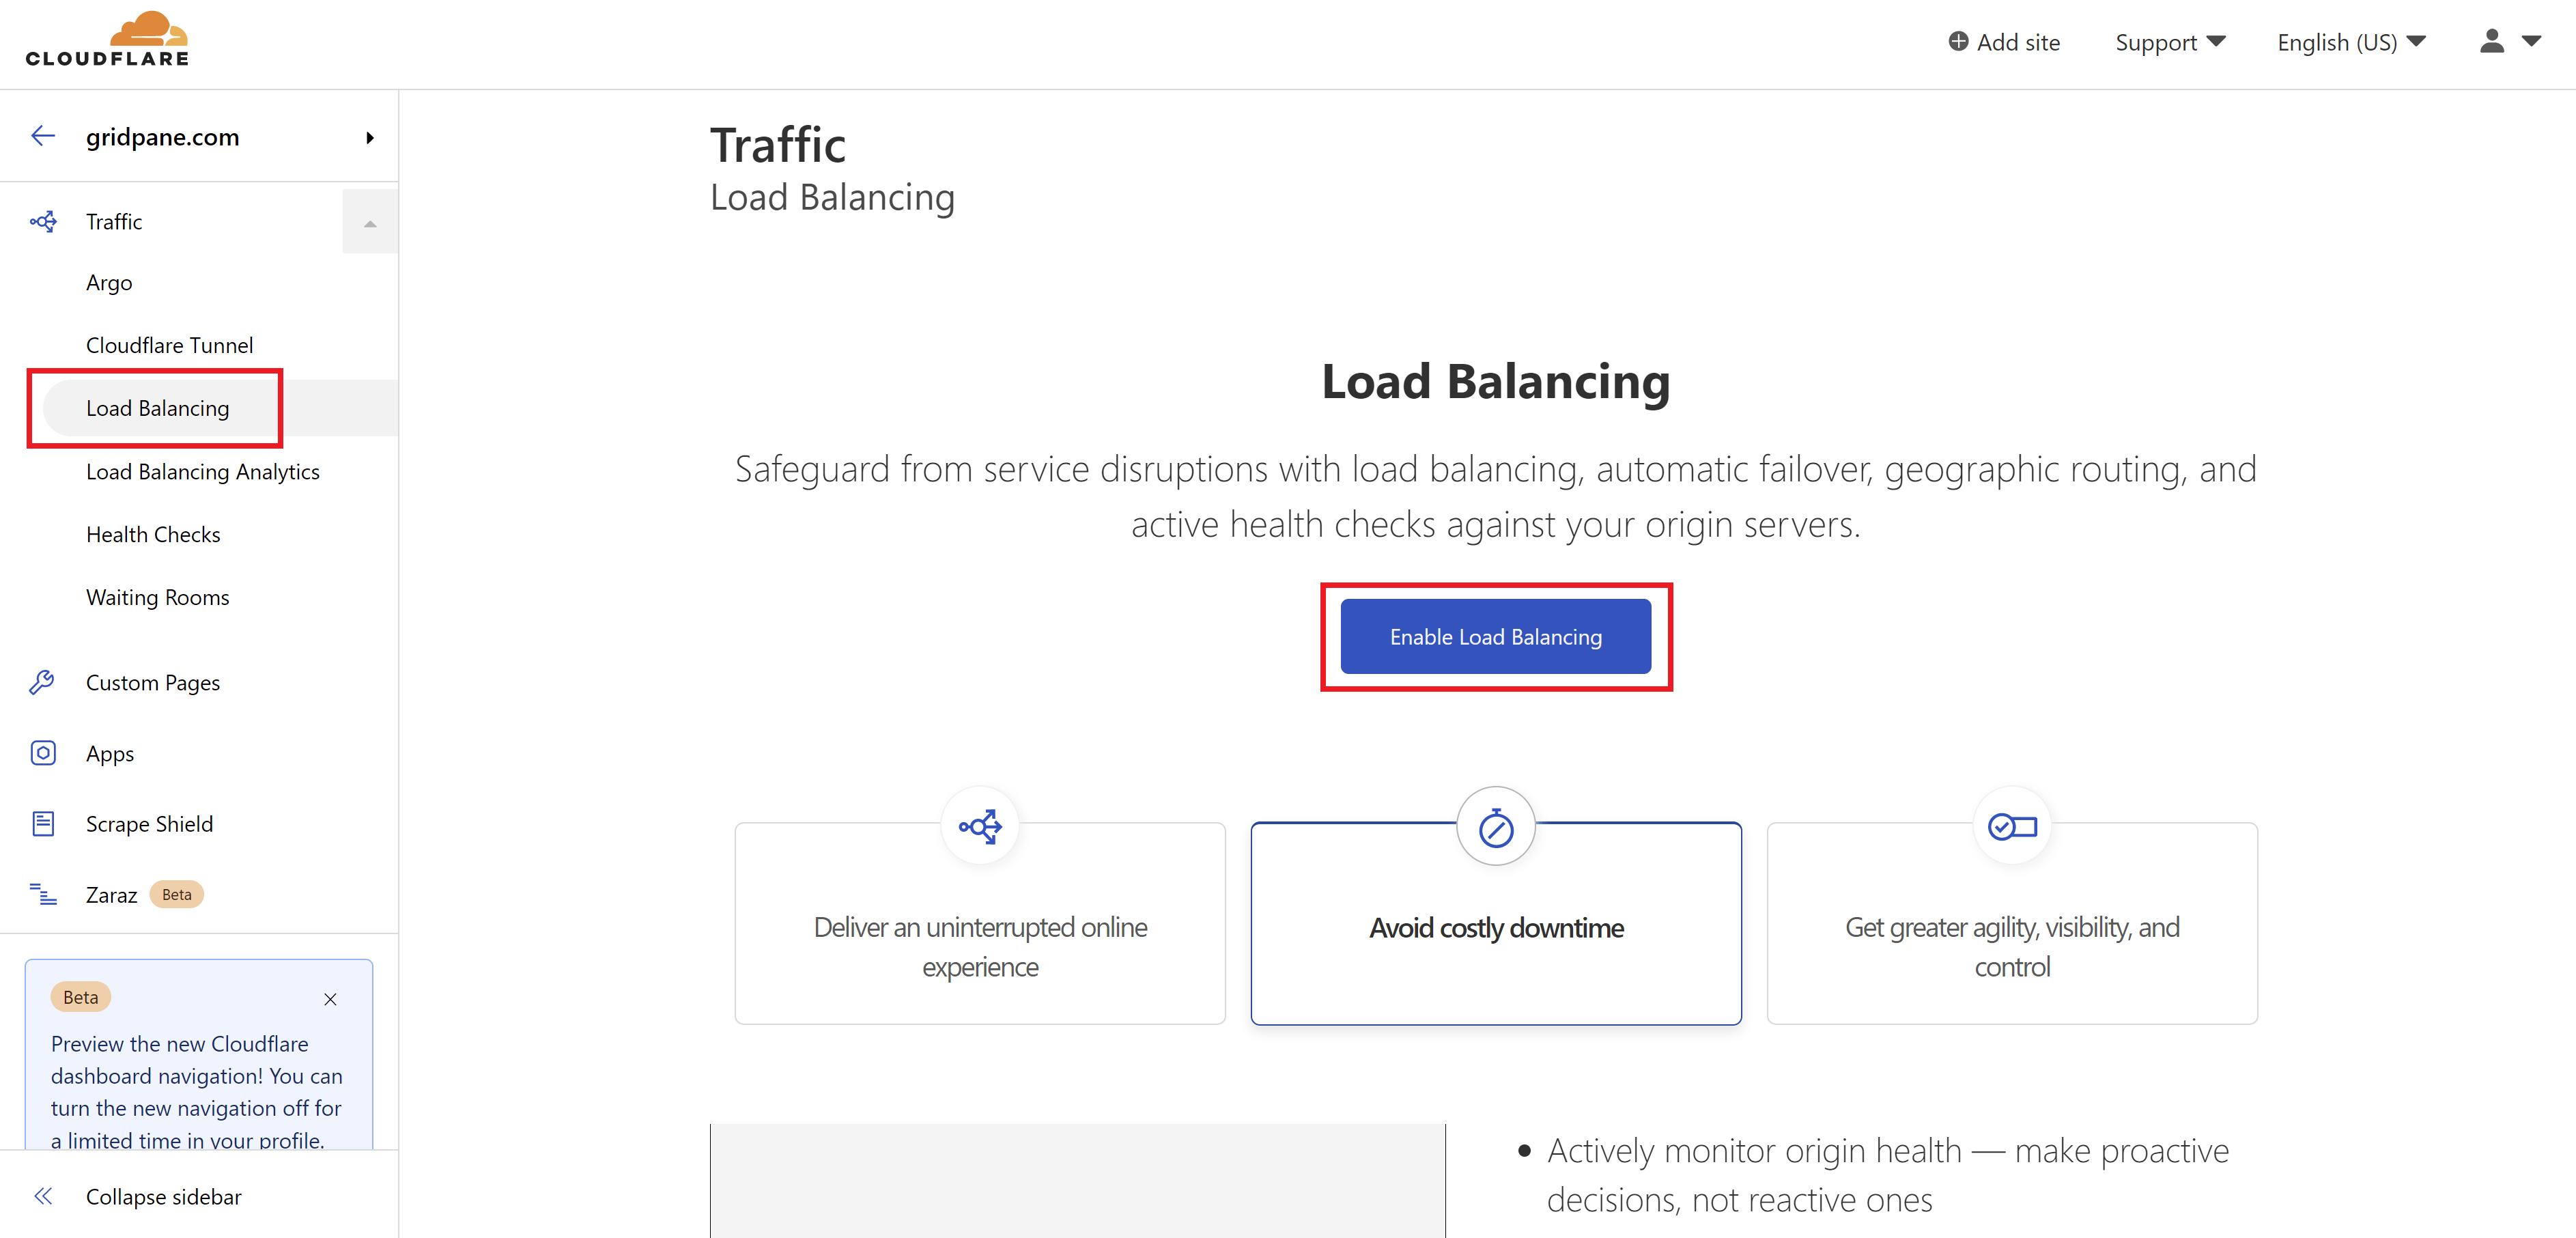
To create a load balancer, click through to your website inside your Cloudflare business relationship, and then through to the Load Balancing inside the Cloudflare Traffic tab.
Load balancing is a paid feature and has to be able enabled before proceeding.
You'll exist asked to confirm your subscription or enter your payment details before activation:

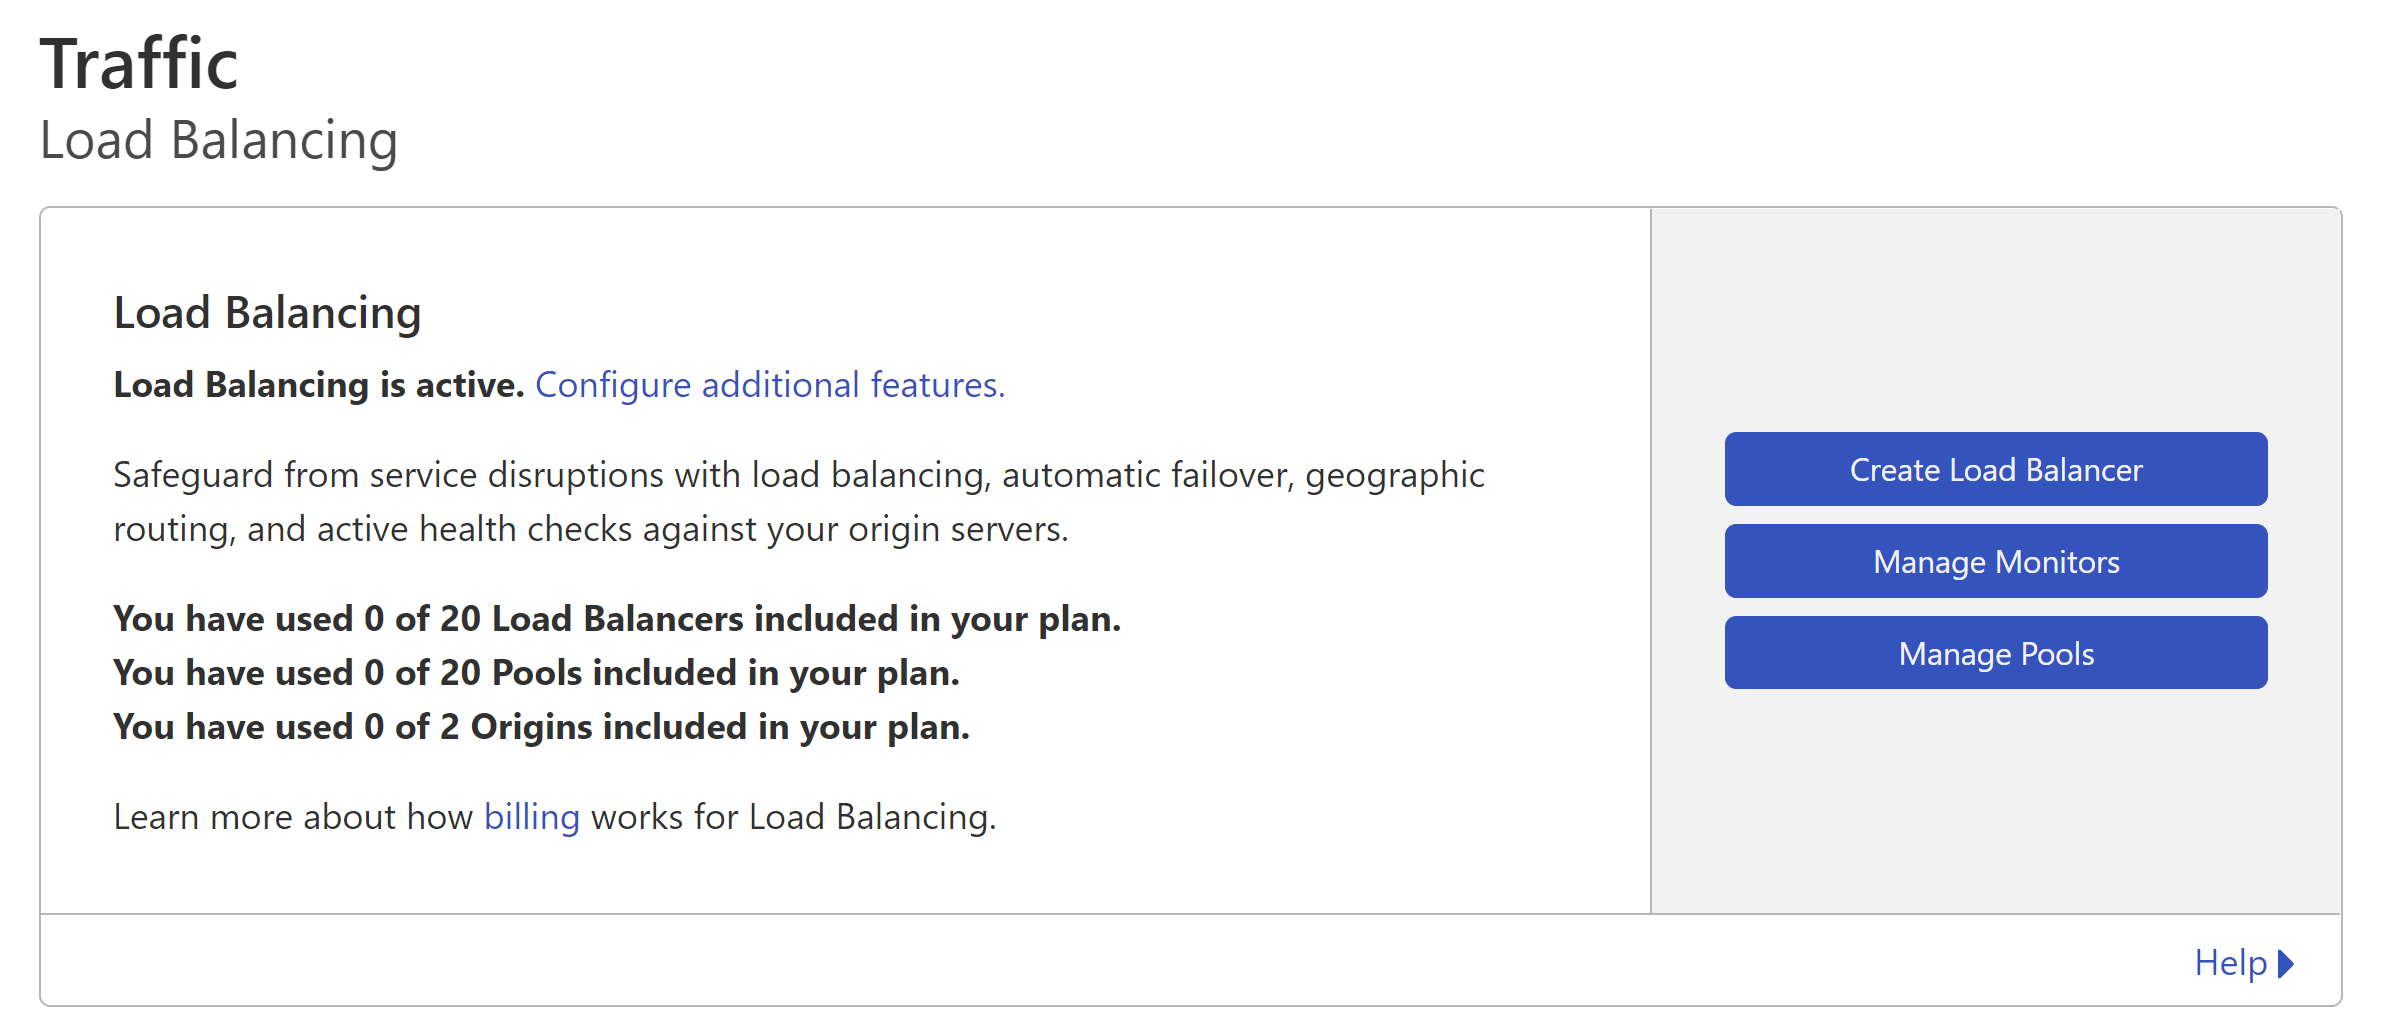
When load balancing is enabled, you'll run across these three options as blueish buttons:
- Create a load balancer
- Manage monitors
- Manage pools
The post-obit steps are technically the nigh efficient if this is your outset time setting up a load balancer.
Step two: Create 2 monitors
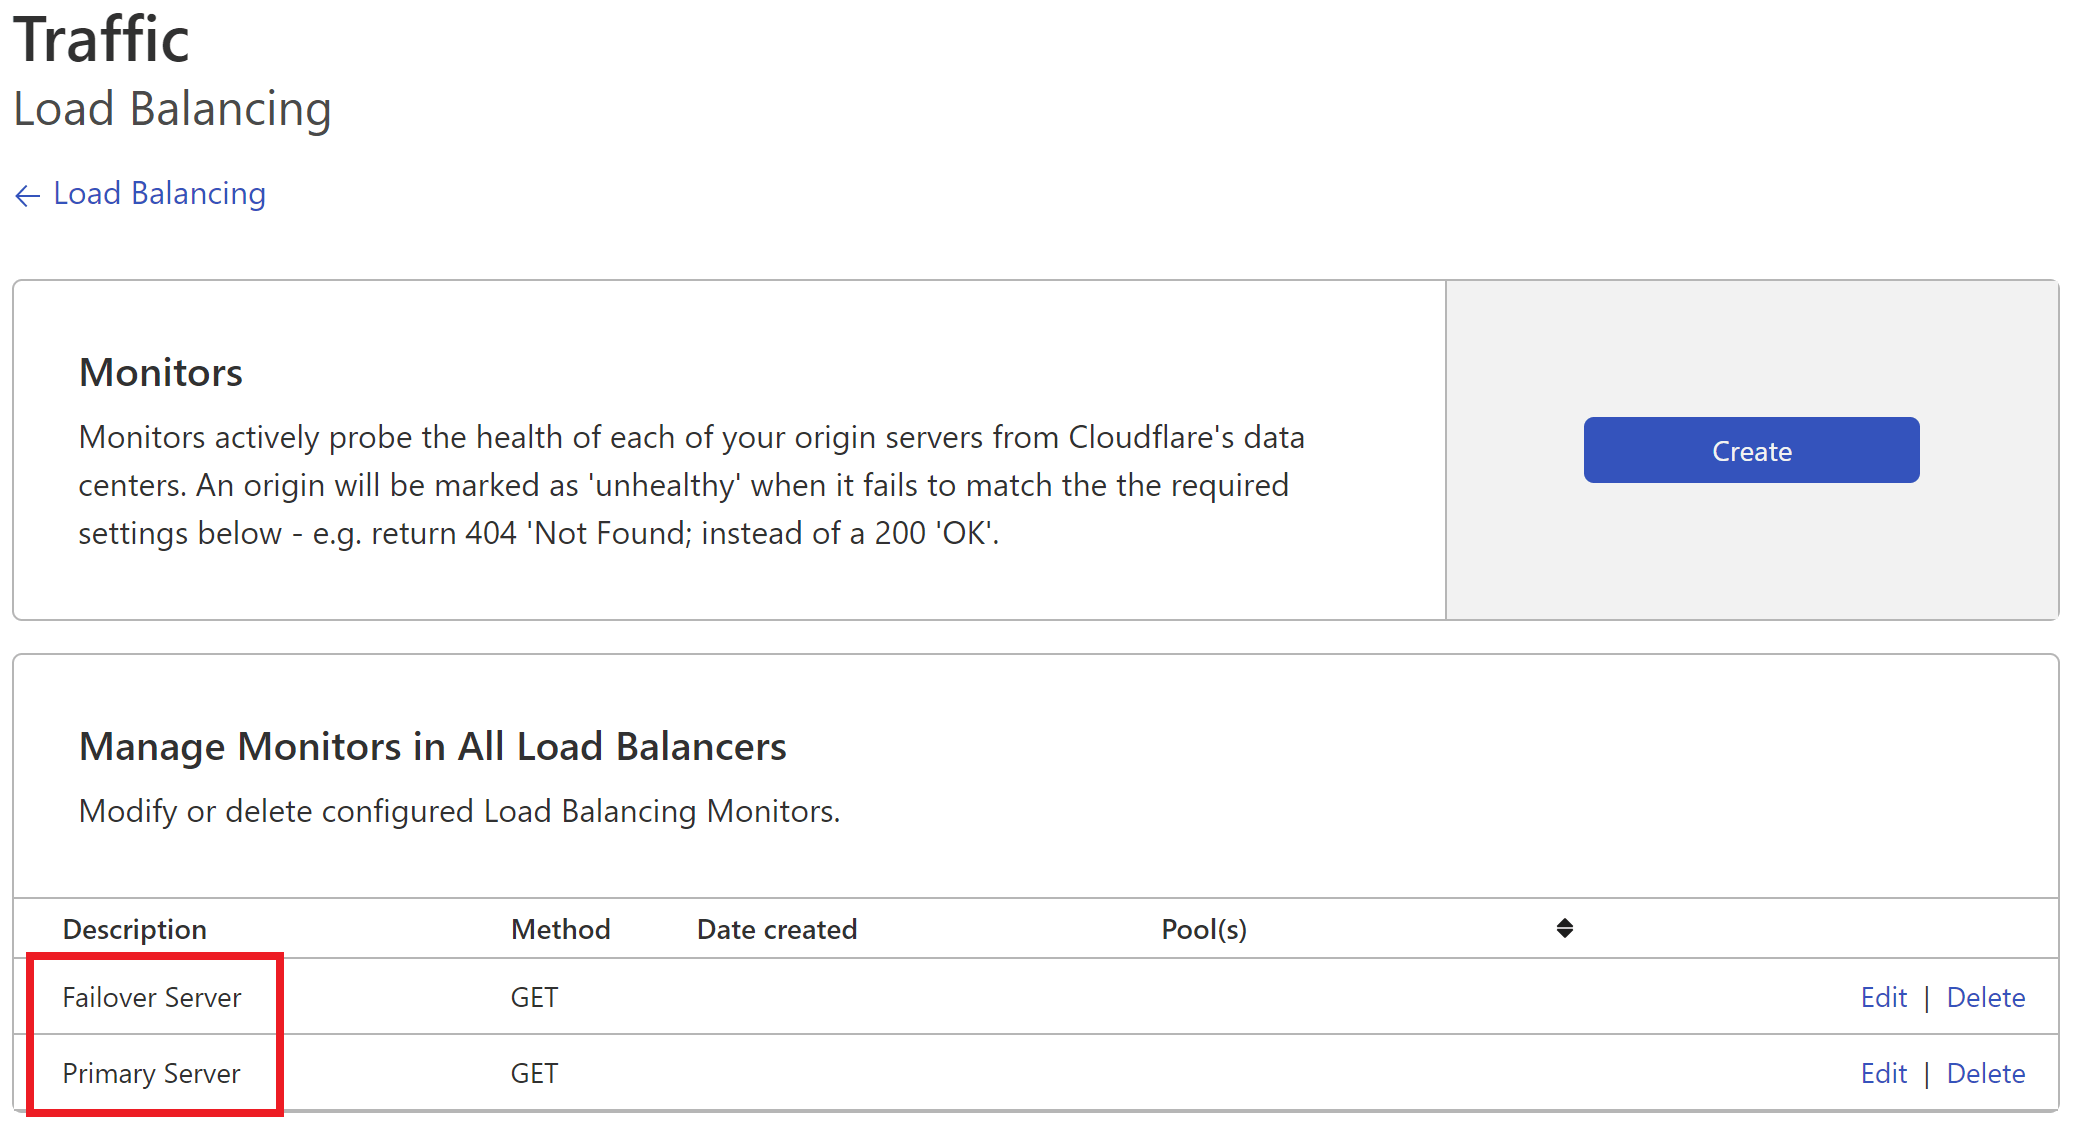
Click the Manage Monitors push to brainstorm setting up your health monitors.
To ensure your monitor is able to accurately detect whether your site is salubrious or not, the following is how you may want to configure these settings, just feel free to arrange as you come across fit:
- Give your monitor a name
- Leave the default HTTP check, and if you wish, fix a more than lightweight page than the homepage to monitor.
- Interval: sixty
- Method: GET
- Timeout: x seconds
- Retries: 2
- Expected codes: 200, 301, 302
- Follow redirects: Check (yes)
- Configure a asking header – choose whatsoever name, prepare the value to your site'due south hostname (the address without the https://).

Click "Save" when prepare, and and so echo the process to create a second monitor for our Failover site.
Step 3: Create a primary pool and a failover puddle
Back on the principal Load Balancing folio, click the "Manage Pools" button, and so click the "Create" button in the Origin Pools page.
Your main source server will be used for your Origin Puddle in your load balancer.
- Pool Name: Give your origin pool a name (E.chiliad. Primary-Server)
- Description: Add a description if needed.
- Origin steering: Get out as the default.
- Origins: Set your origin name (anything you want), primary source servers IP accost, and be certain to enter a hostname with your site address (minus the https://) as pictured below. Set the weight to "1".
Important: If yous don't prepare a host header Cloudflare volition not be able to properly monitor the health of your site.
You can skip past the follow settings:
- Configure co-ordinates for Proximity Steering
- Configure Load Shedding
Next:
- Health threshold: As nosotros only accept one server, we need to set our health threshold to "1". This means that if our 1 server goes down, Cloudflare will brand the switch to the failover server.
- Monitor: Set the monitor that y'all created in the previous step for this pool.
- Health Cheque Regions: In our instance, we're but allowed to select one, but depending on your subscription you lot may be able to select up to 8.
And finally, enter an email address for where y'all wish to receive notifications nearly the health of this server.
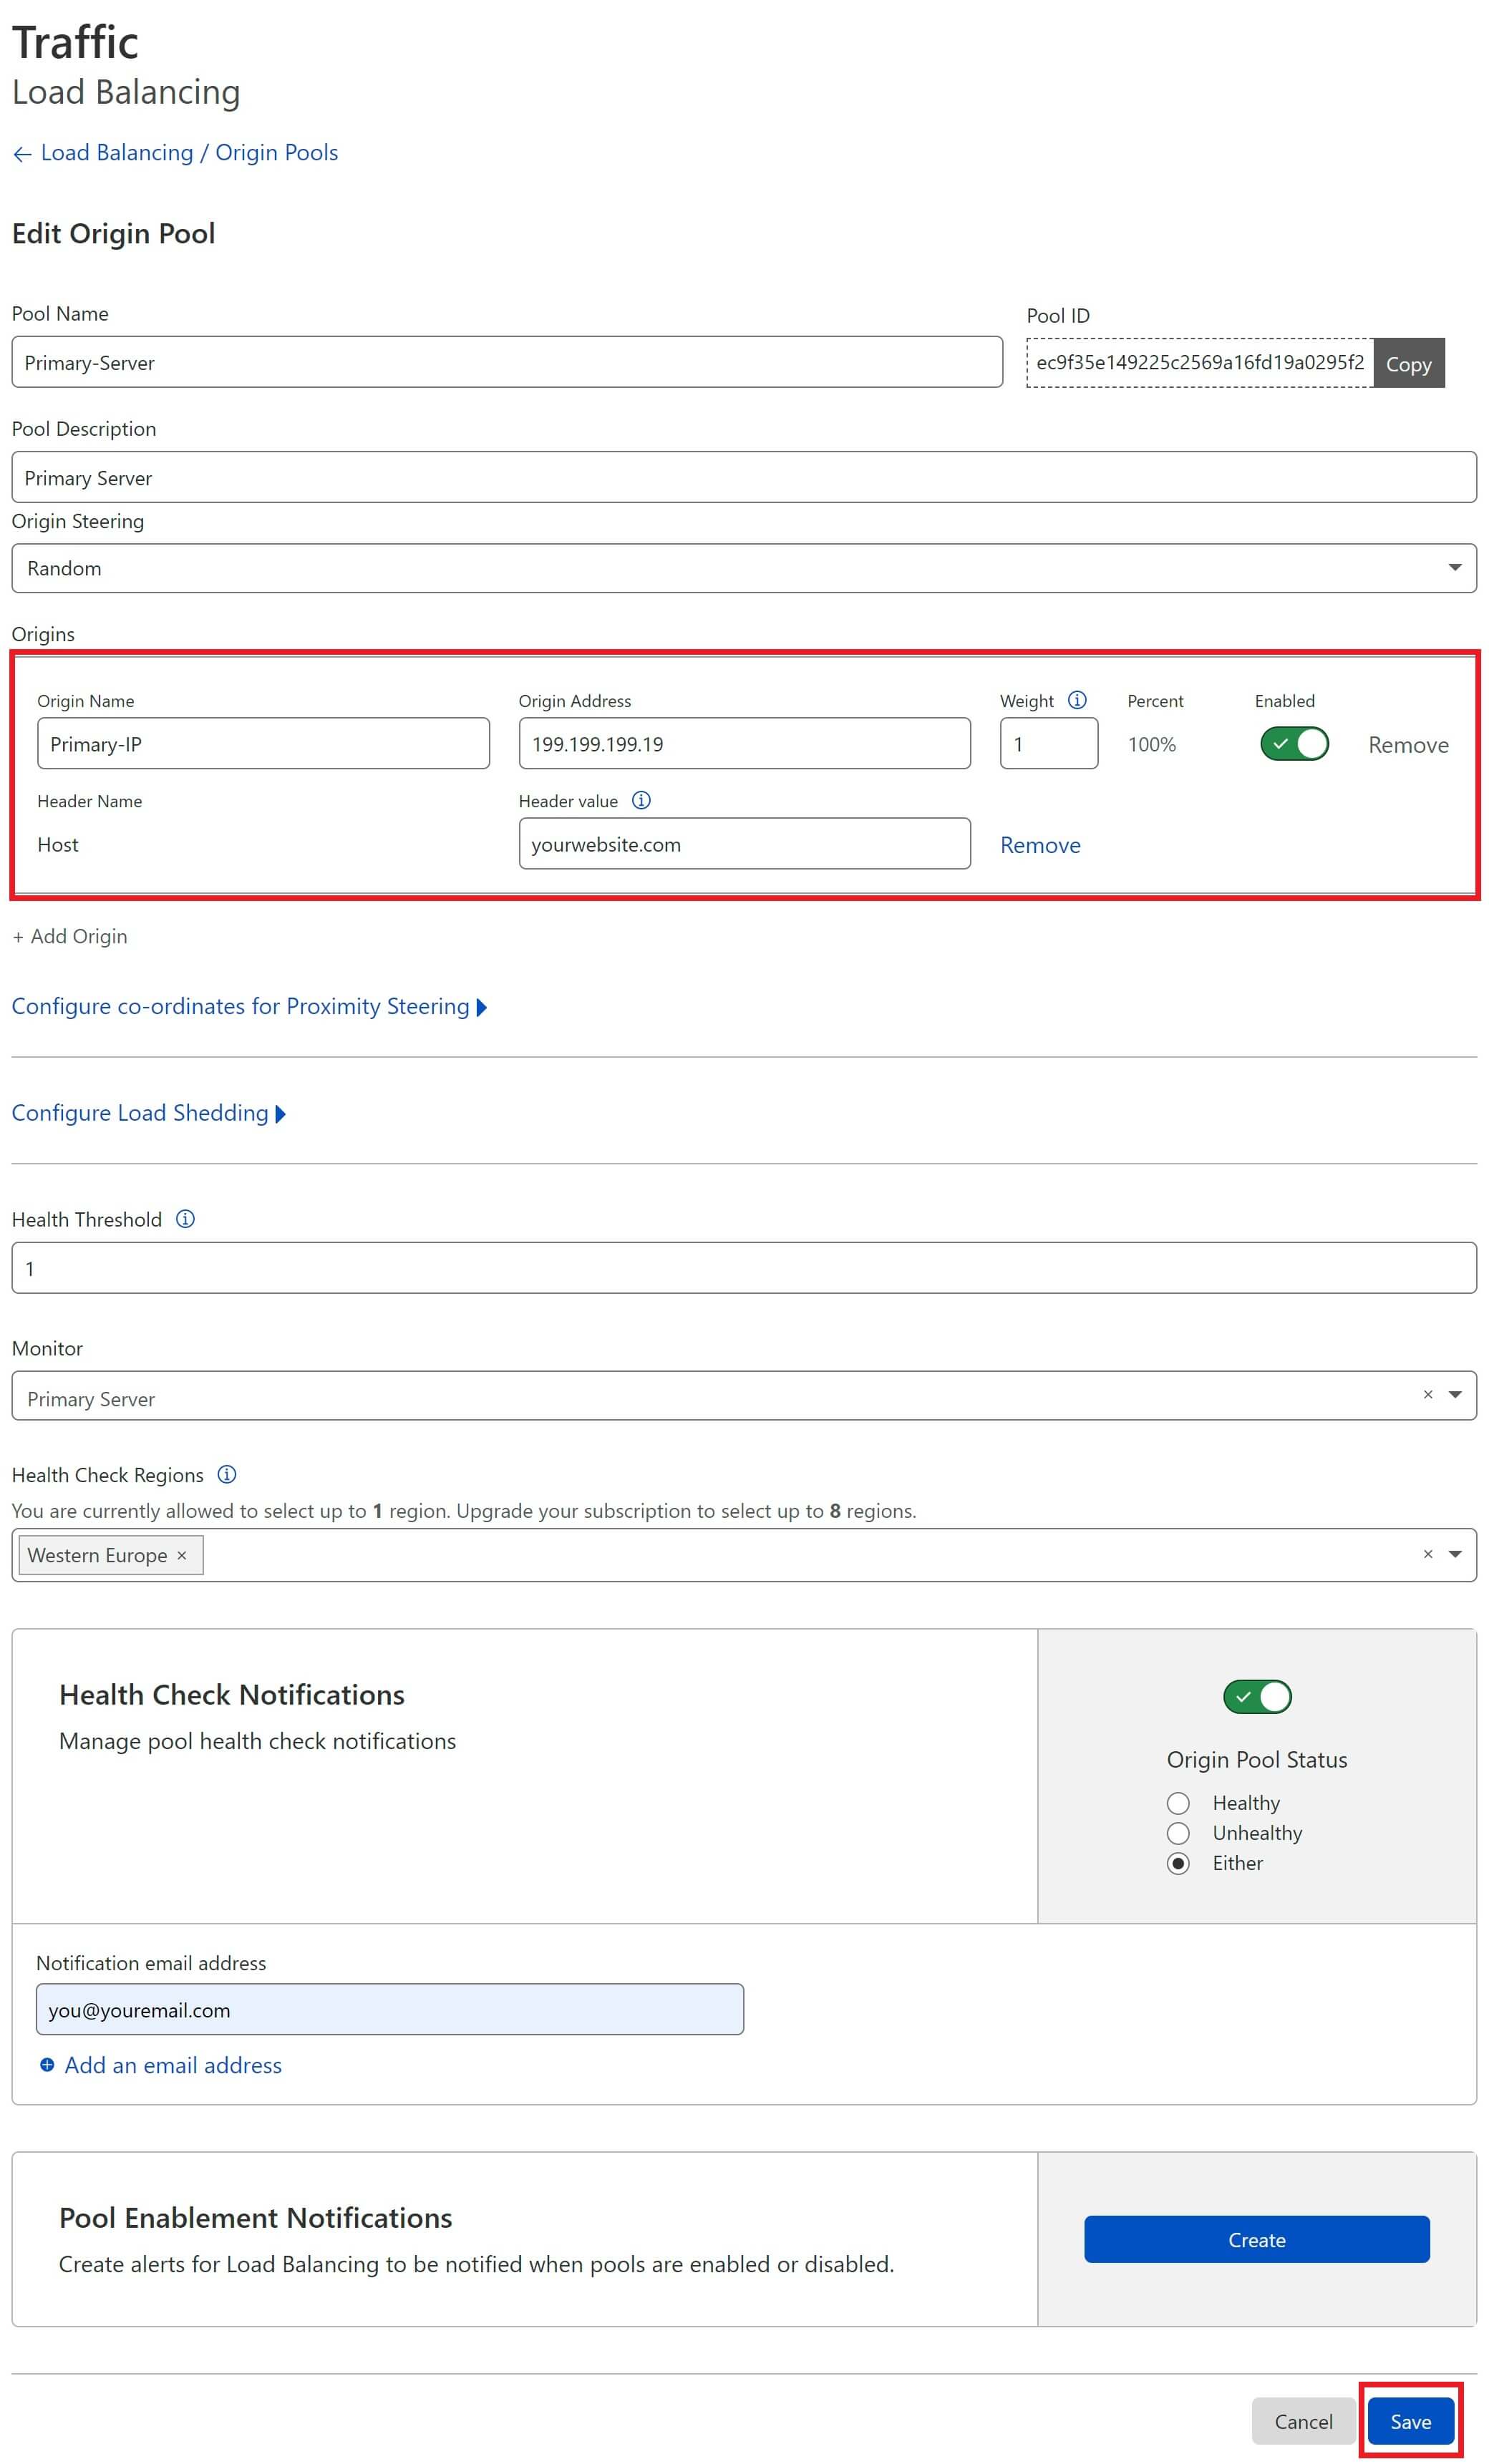
ClickSave to cease up.
Create a Secondary Pool
Now we demand to add another pool for our failover. Repeat all of the above to add your failover server (and it'southward correct IP address).
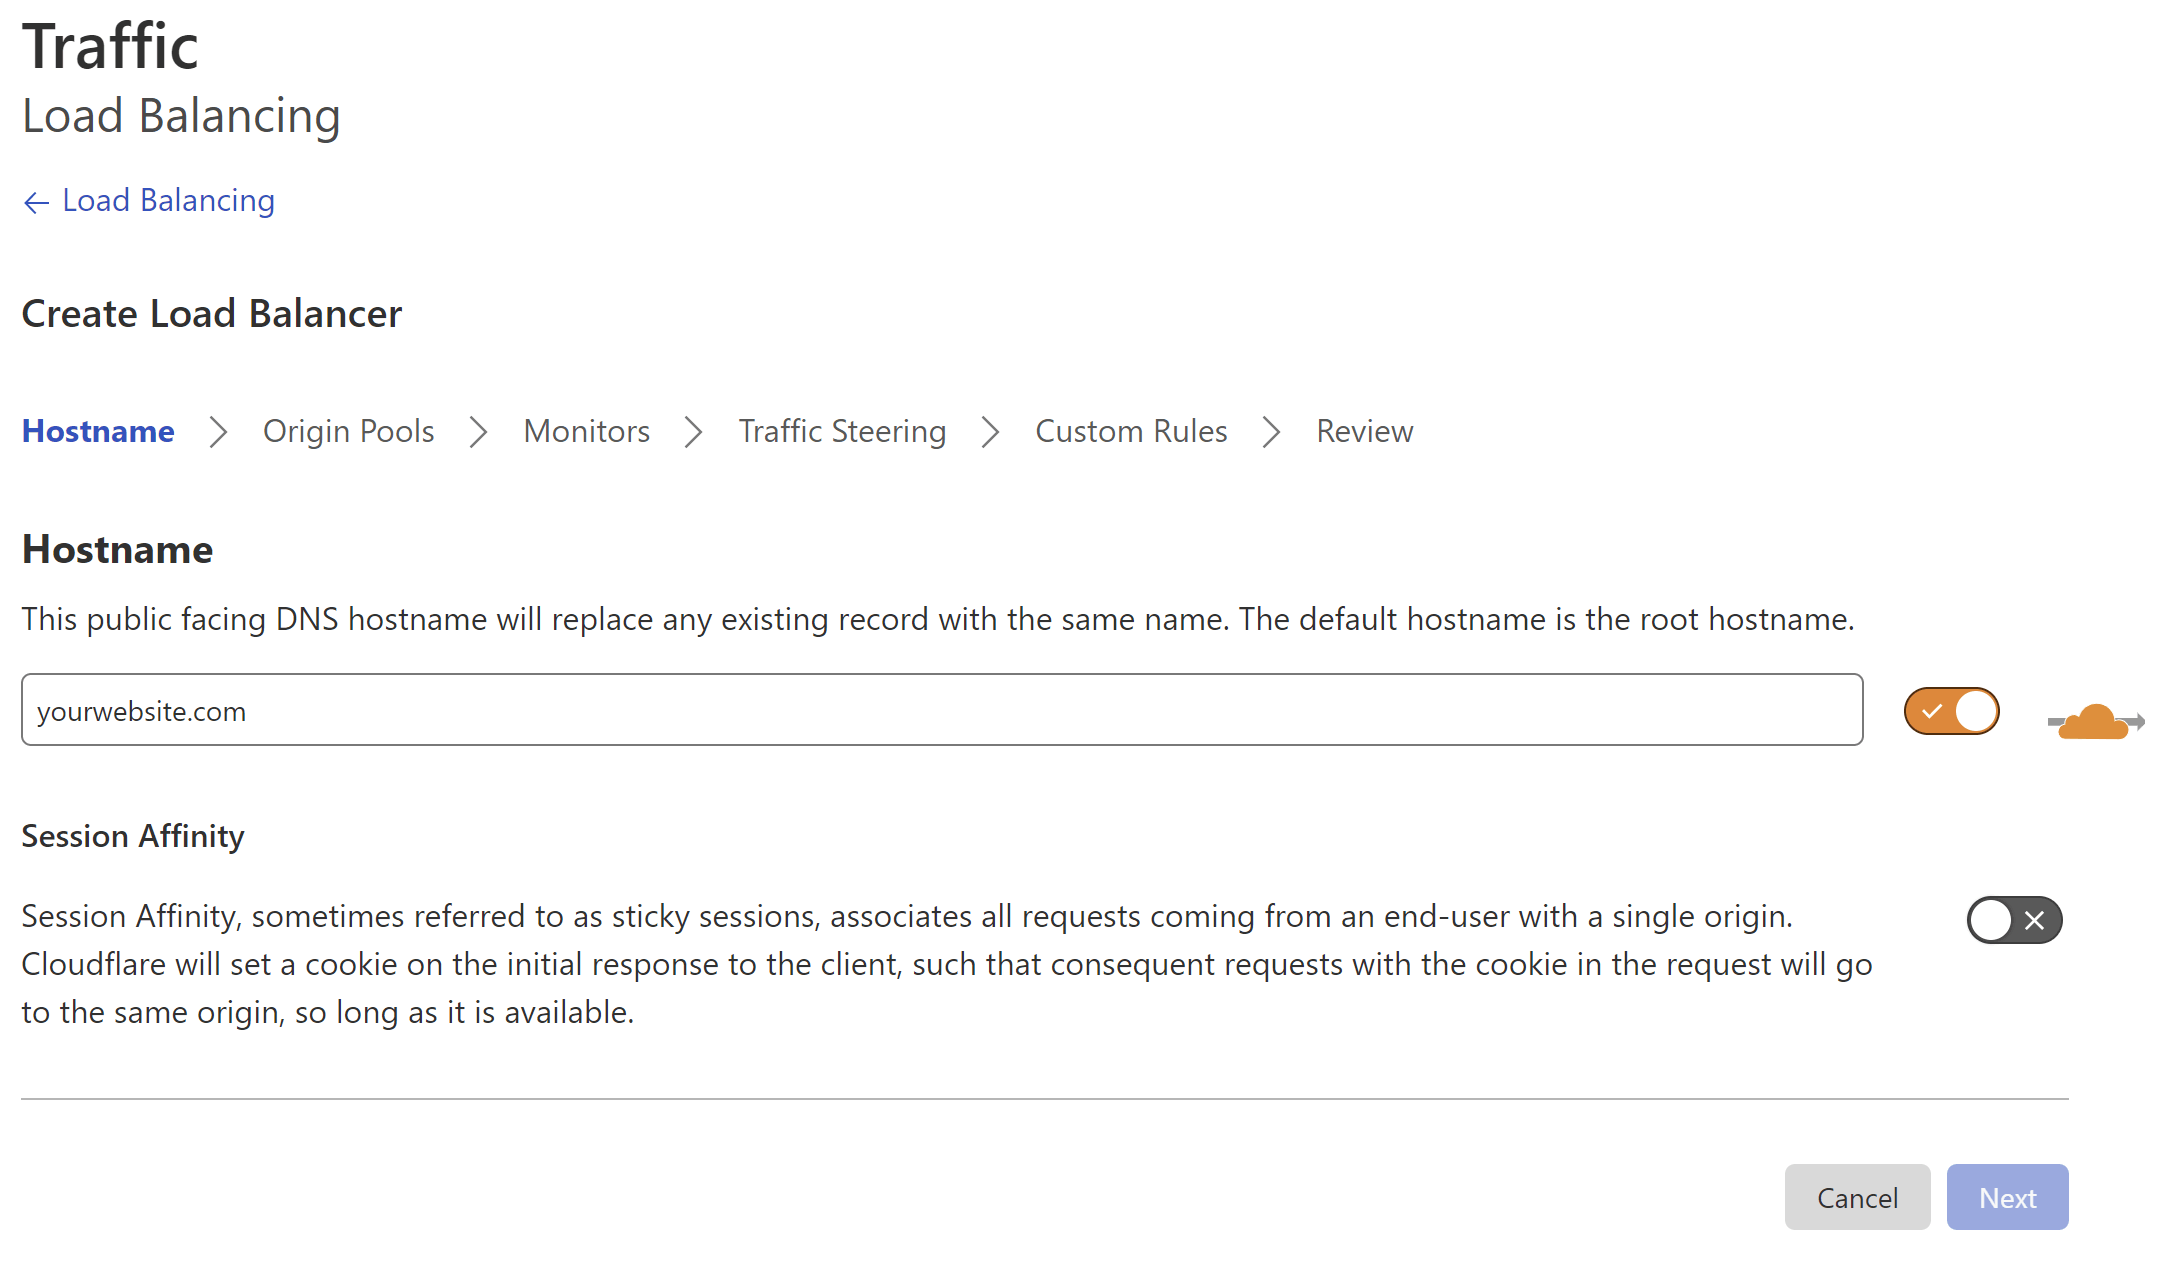
Step iv.ii: Gear up Your Hostname
Your hostname is either your root domain (e.chiliad. yourdomain.com) or a subdomain (sub.yourdomain.com), depending on your site URL. Hither you can also choose whether your traffic is proxied or not.
When configured click Adjacent.
Step 4.three. Set Your Origin and Failover Pools
From the dropdown, select your main server and add it every bit your origin pool:
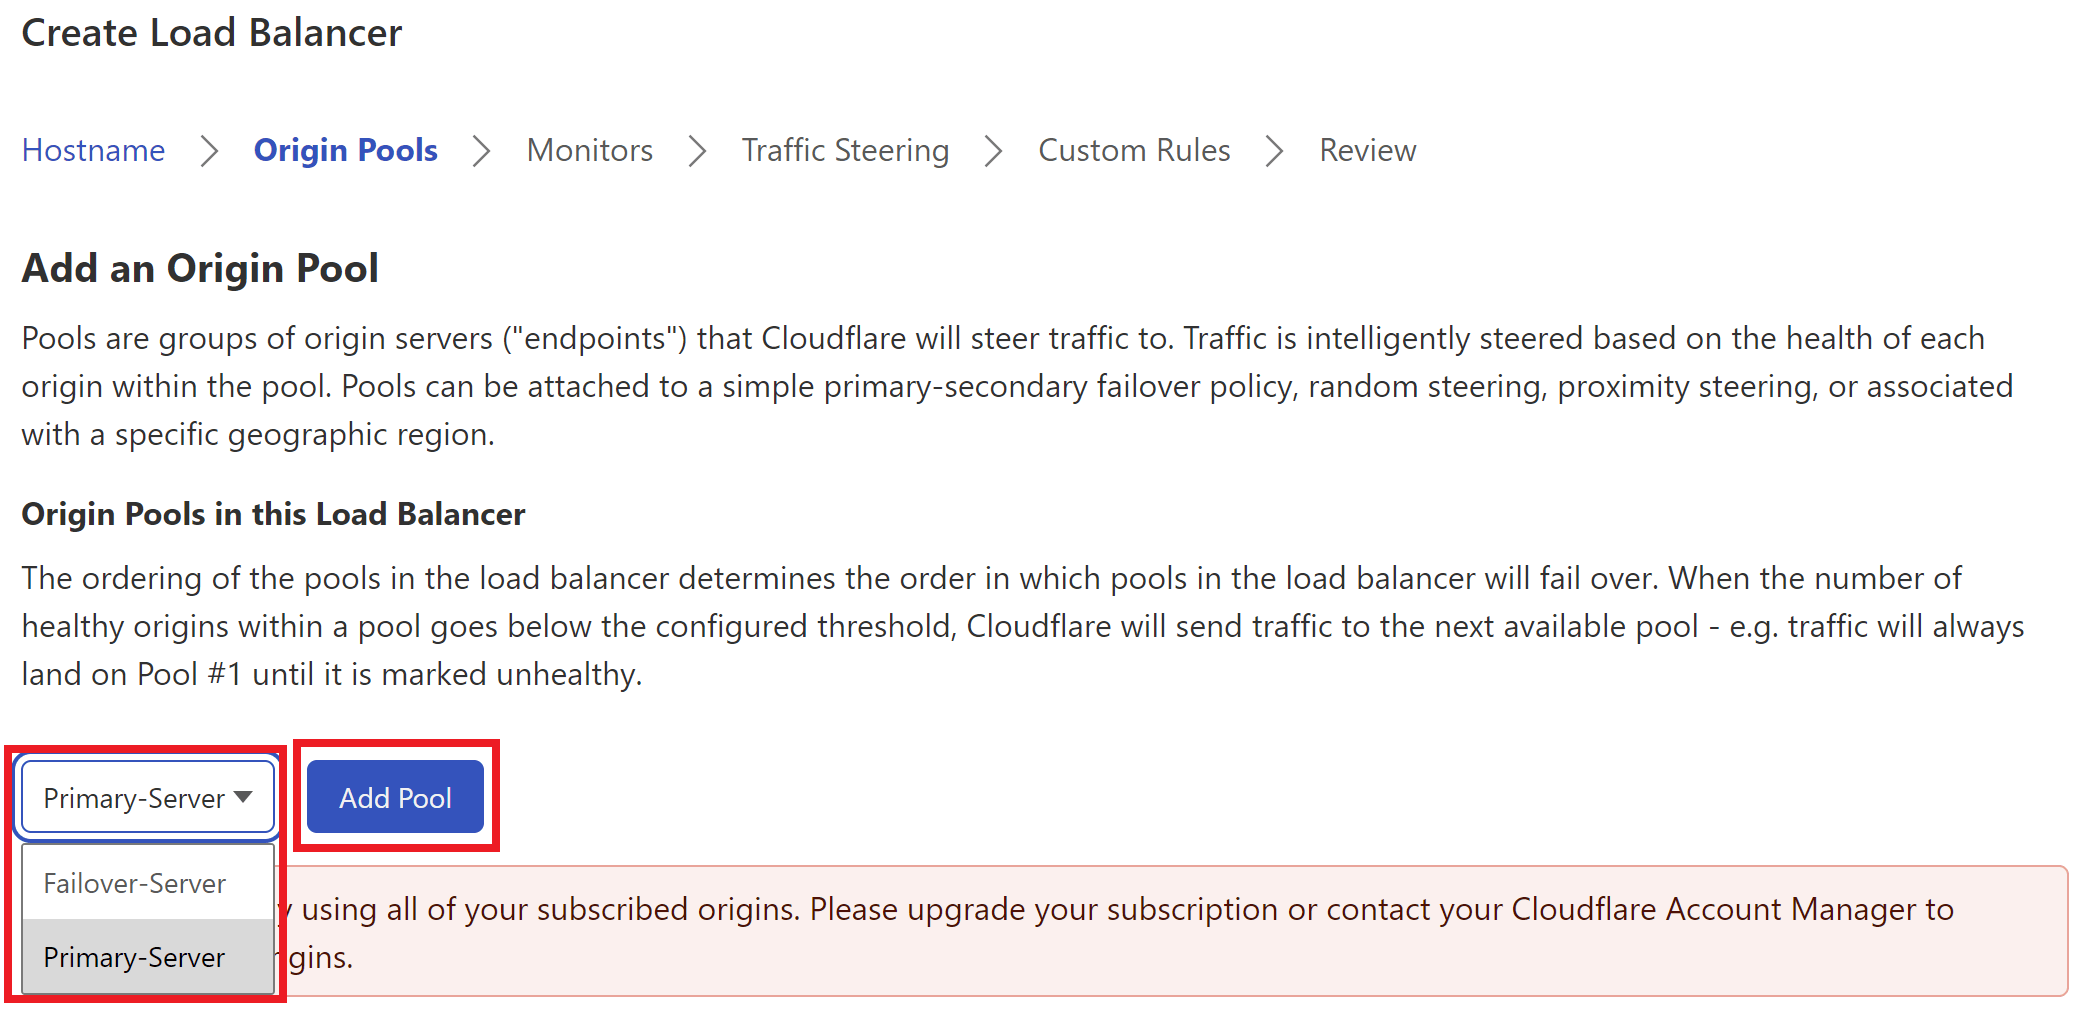
And so prepare your Failover puddle.
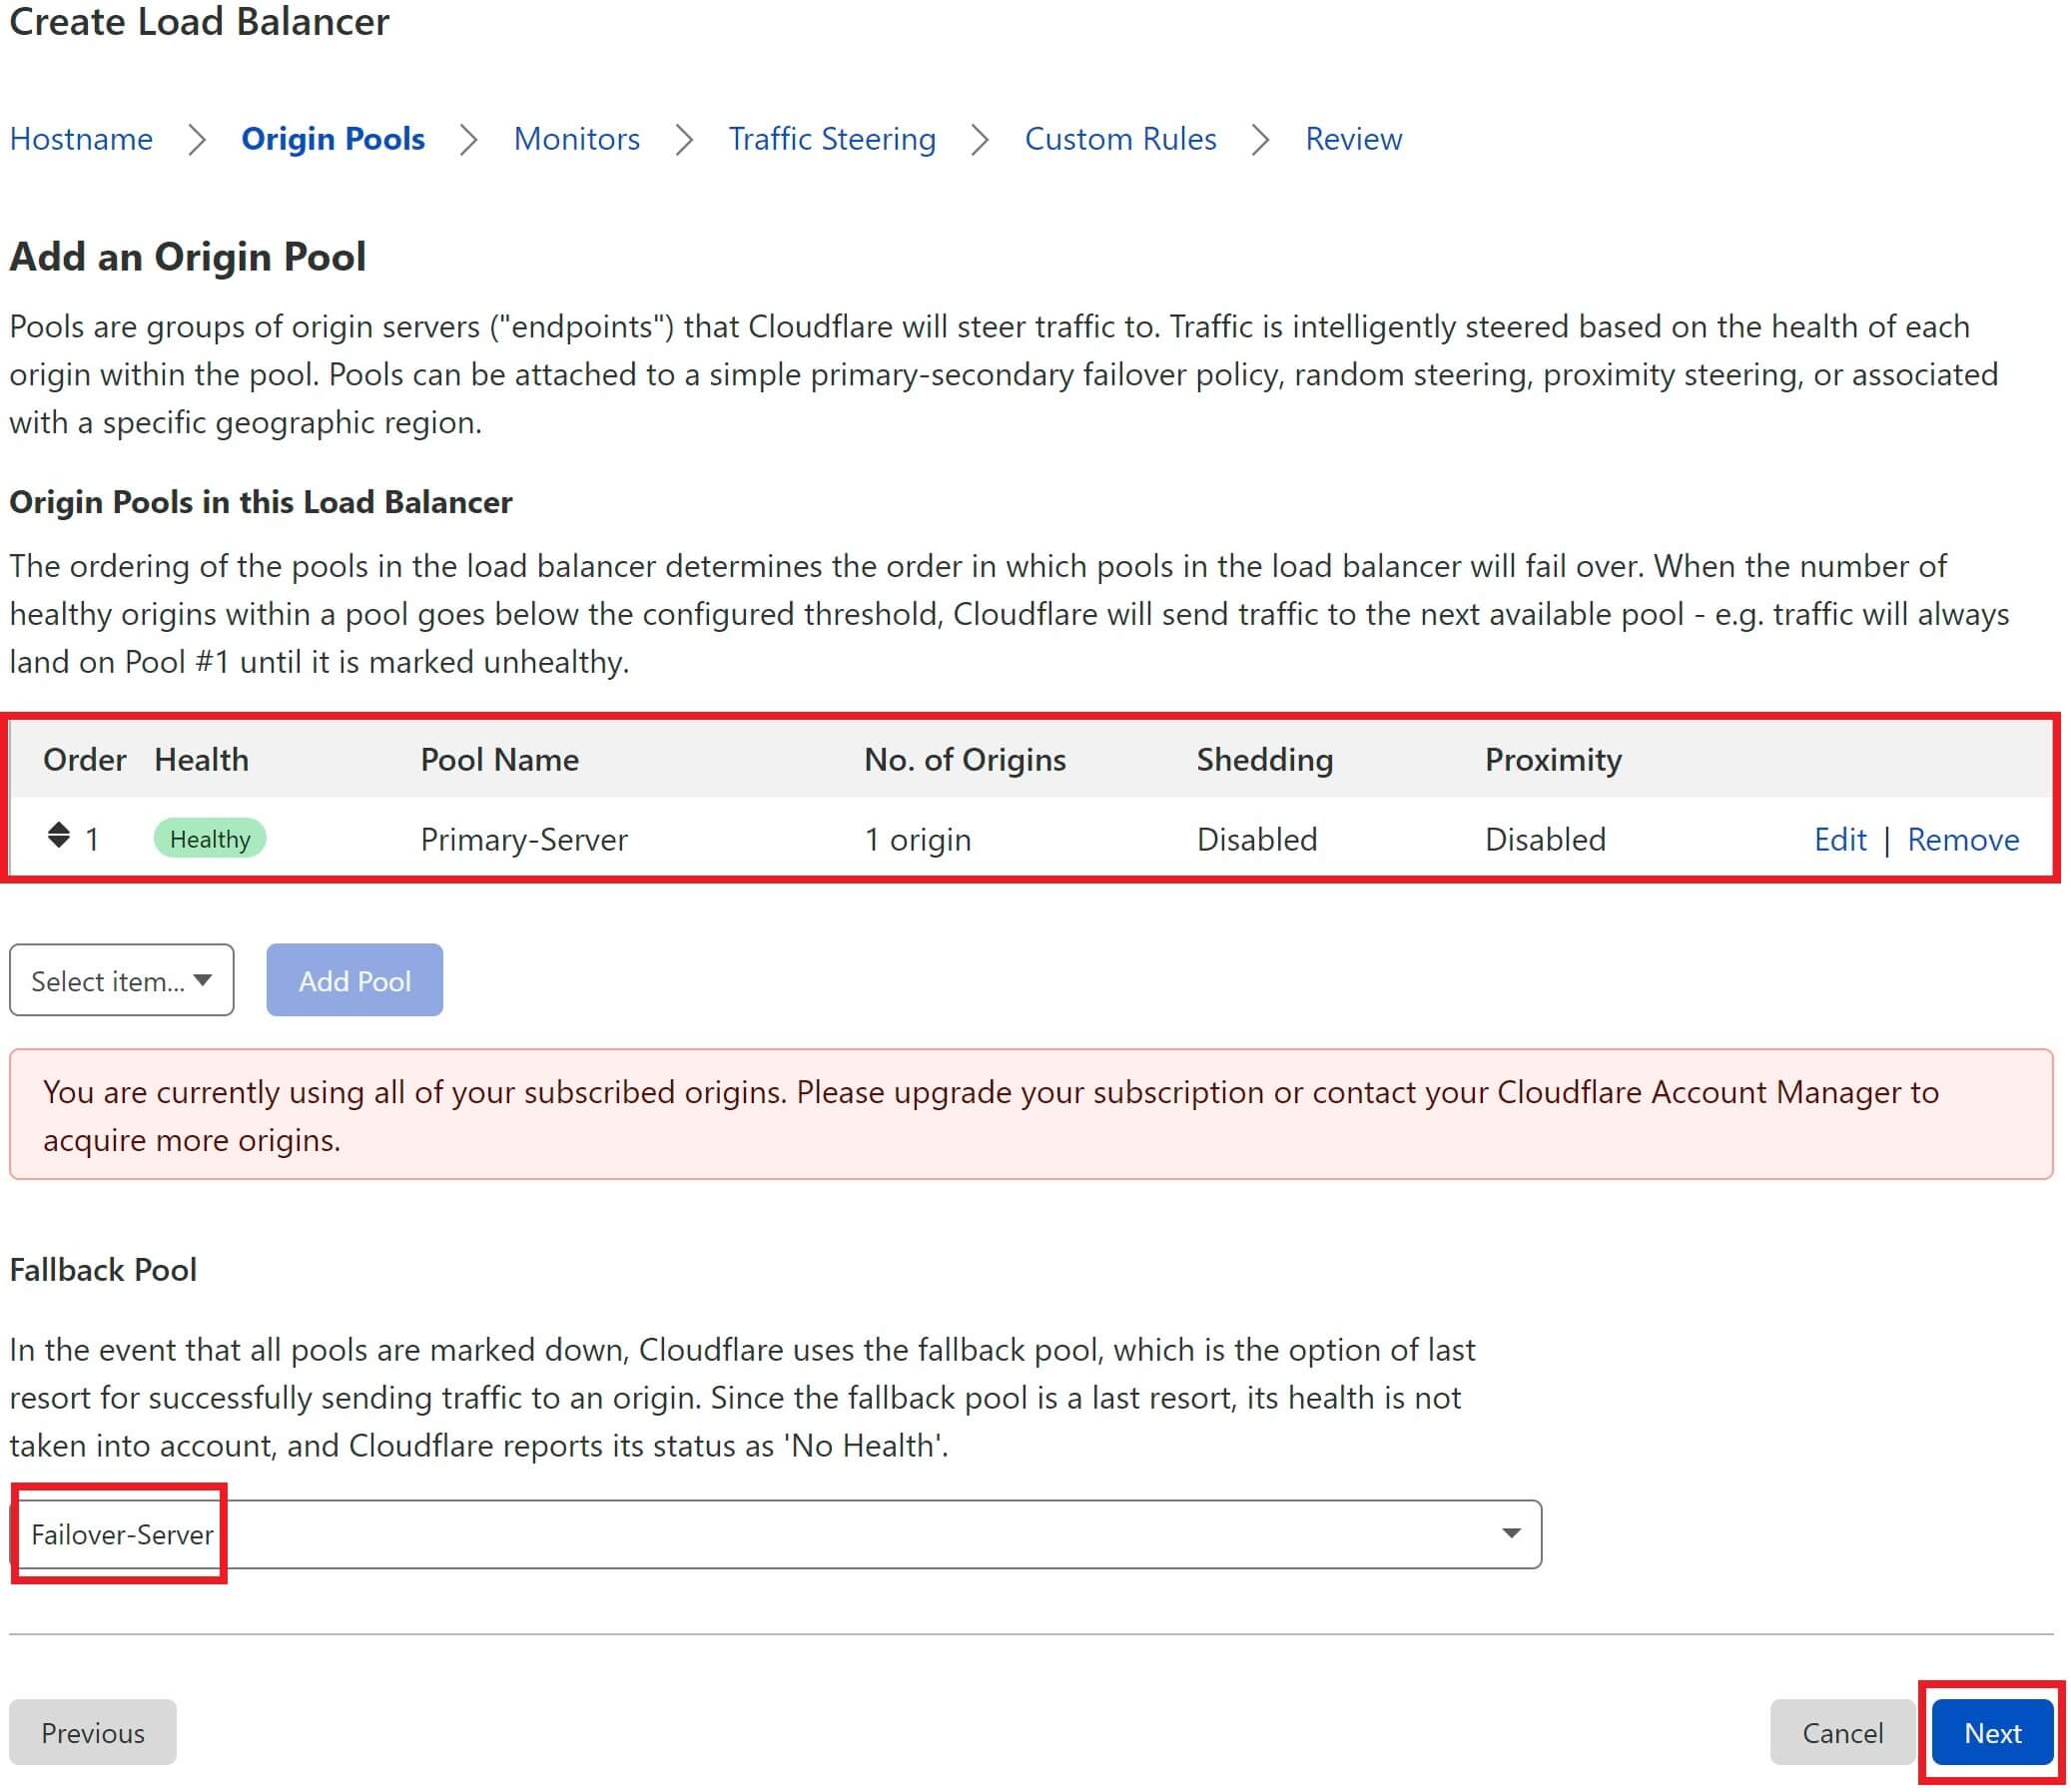
ClickNext.
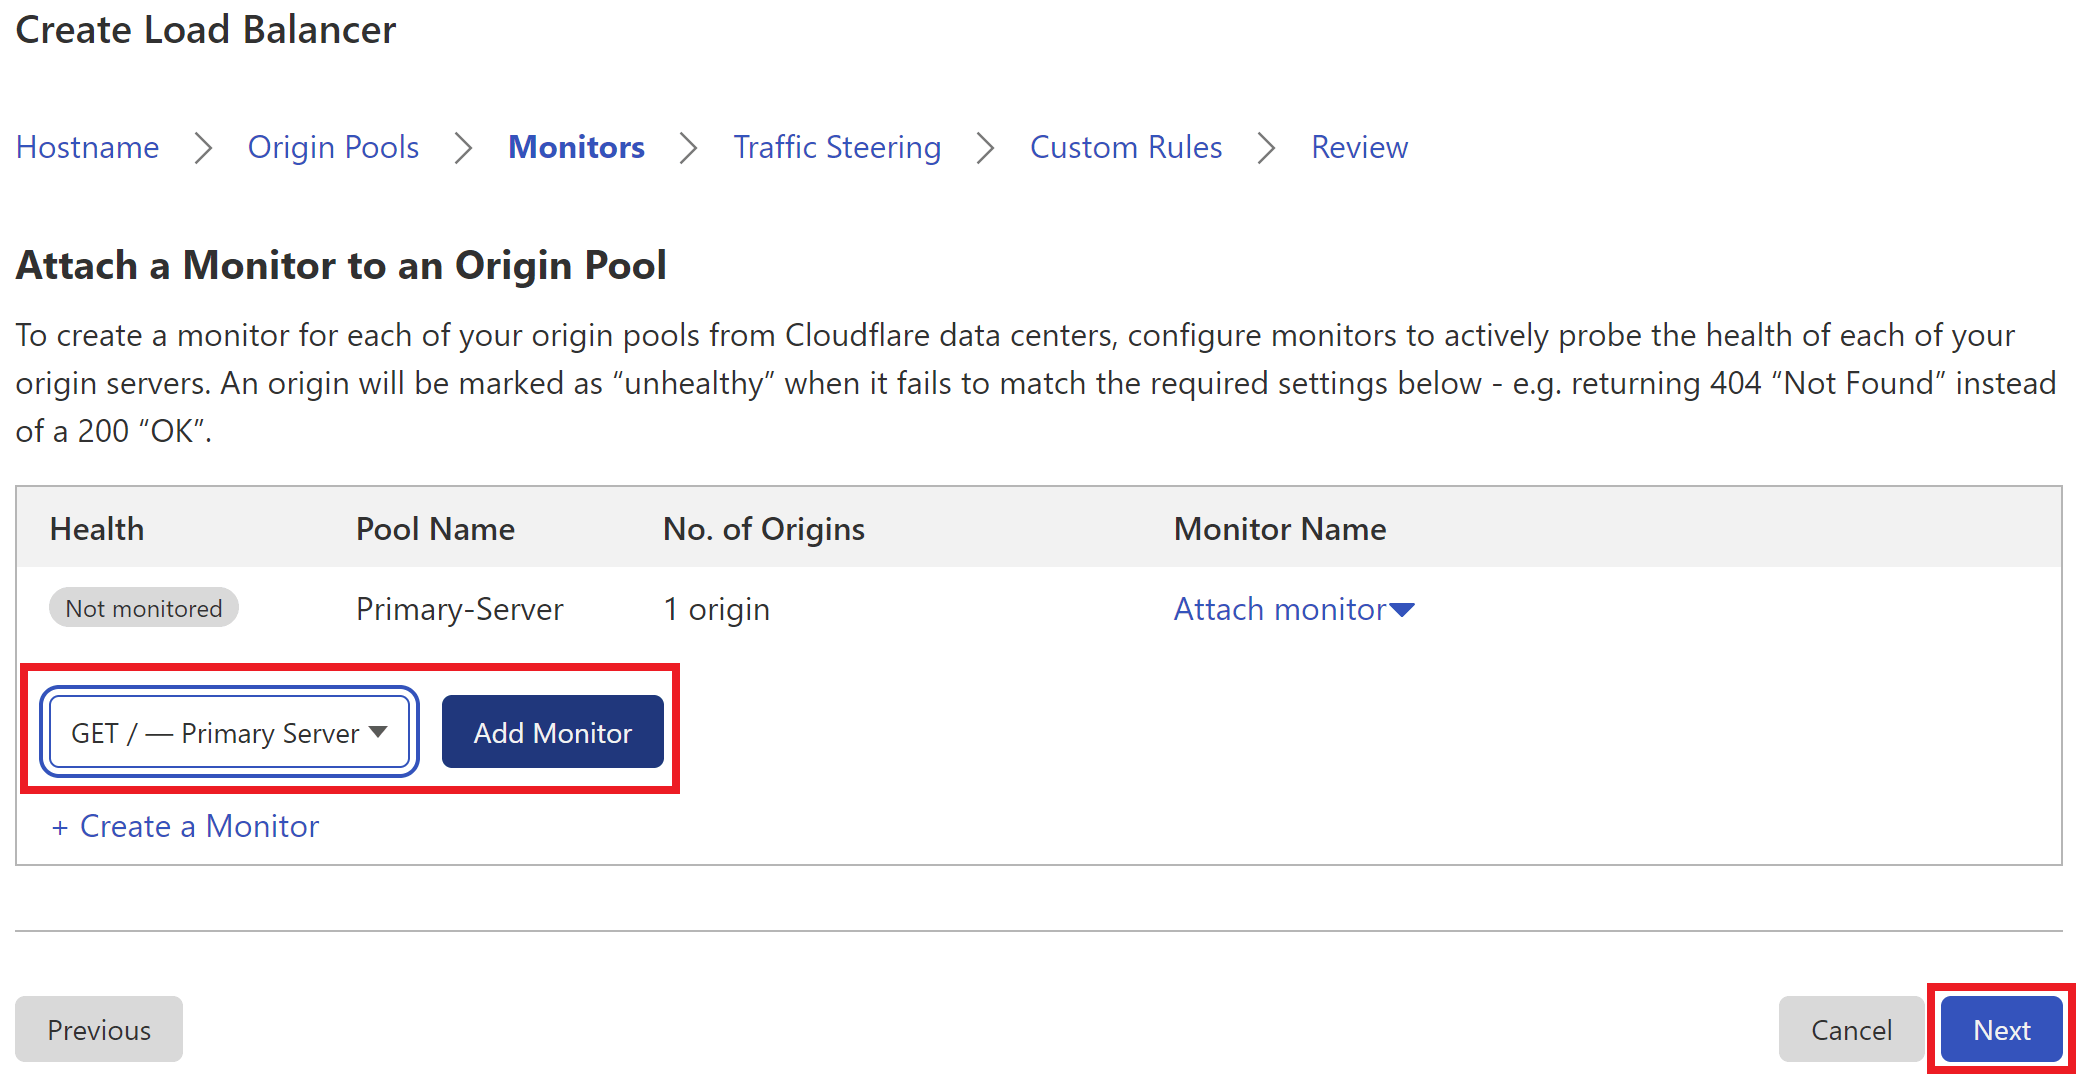
Step four.4. Confirm Your Monitor
The monitor for your origin pool should already have been attached to it in Stride 3, simply if it isn't you can ready information technology now. Also, exist sure to go to your Failover pool and set up the failover monitor and then that you're alerted should it ever go down.
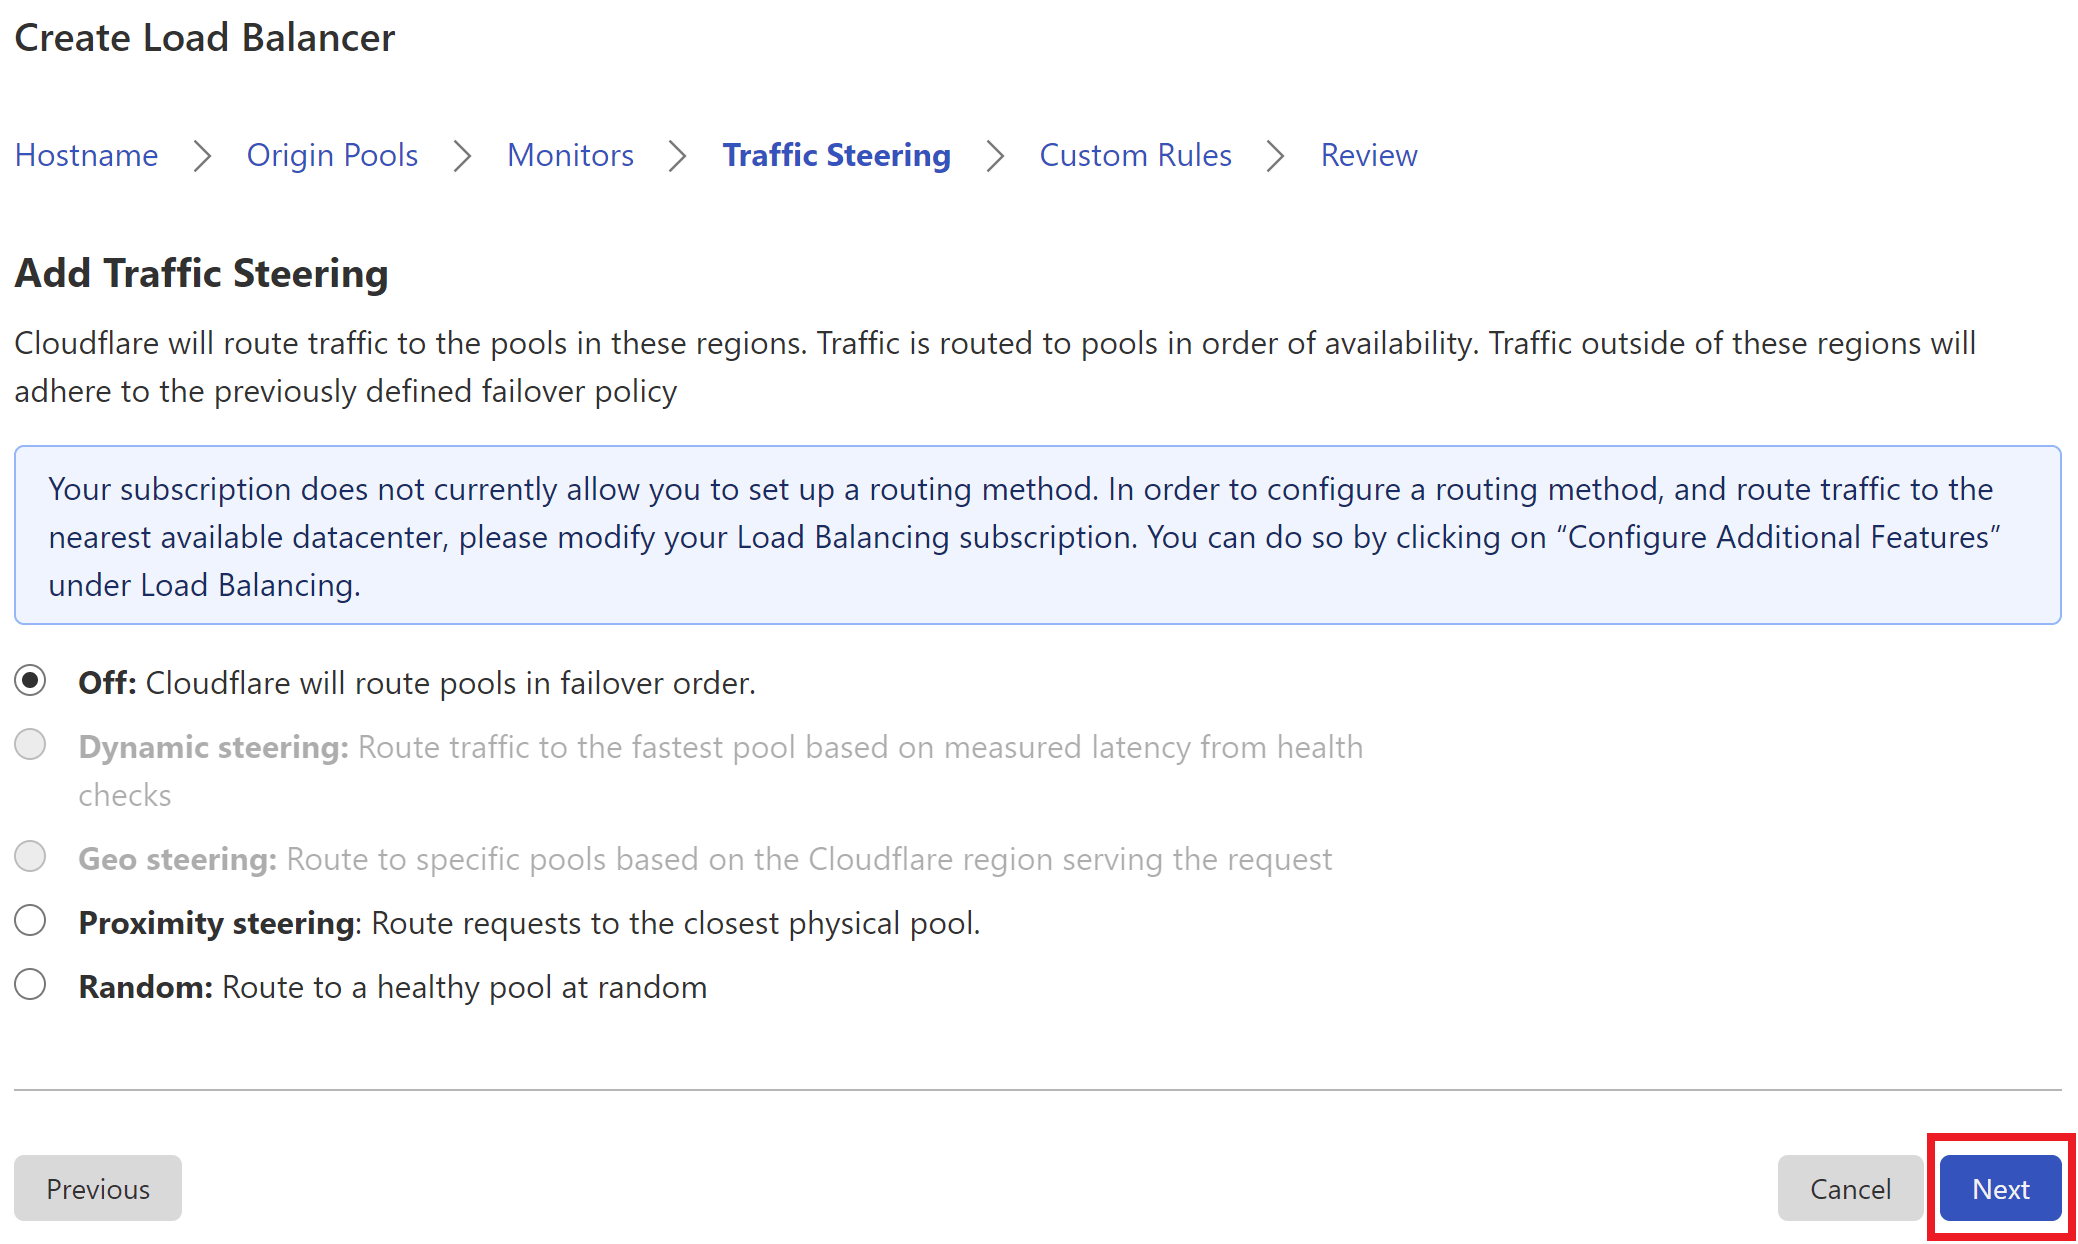
Step 4.five. Traffic Steering
Traffic steering should be ready to off. This is what nosotros need for failover to office.
With this turned off, all traffic will be routed to the primary server unless it fails a health check, in which case it volition then be routed to our failover server.
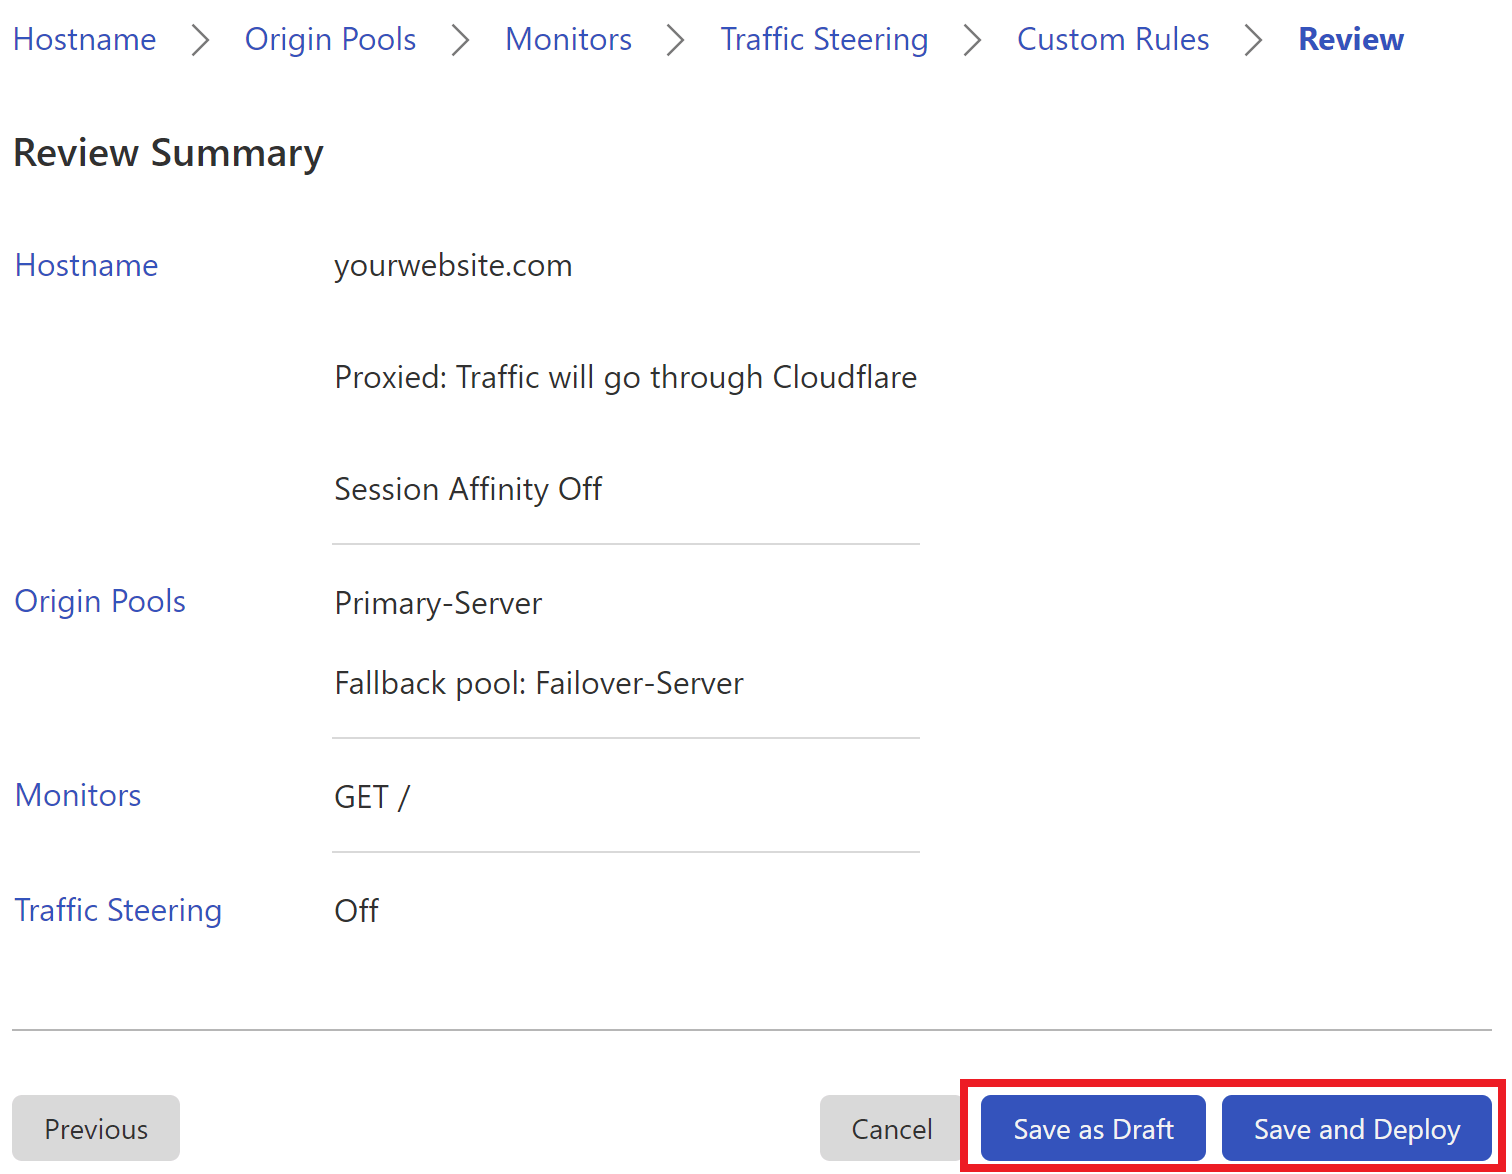
Footstep iv.7. Review and Deploy
Earlier completing the creation of your new load balancer, CloudFlare will display a summary of your configuration and then that you can review and confirm your settings (and make any changes if necessary).
Once you're satisfied, click "Relieve and deploy" and your load balancer volition immediately go live (or save as a draft if you're not even so fix to set it live).
You've now completed your Snapshot Failover setup.

How To Use Cloudflare Snapshot,
Source: https://gridpane.com/kb/how-to-setup-snapshot-failover-with-cloudflare/
Posted by: harriseaut1973.blogspot.com
0 Response to "How To Use Cloudflare Snapshot"
Post a Comment